

1. Ask Tiro: nothing to set up
This is the AI chat built right into Tiro. Ask about a single note, or query every note in your workspace with something like “summarize the last 2 weeks of meetings.” Each answer carries source numbers that jump you to the notes it drew from. Nothing to configure, so start now. → How to use Ask Tiro2. Wiki: build the knowledge base AI reads
As notes pile up, the wiki automatically pulls out people, topics, and decisions to build a knowledge graph of your workspace. With a wiki in place, answers from Ask Tiro and outside AI come back faster and more on point. Turn it on from the Pro plan and up. → About the wiki3. MCP: connect to Claude or ChatGPT
Connect Tiro MCP and Claude or ChatGPT can search and read the Tiro notes and wiki you have access to. How you connect depends on which AI you use and where, so start by picking your case.- I use Claude at claude.ai in my browser → follow Connect from your browser. No installs, no terminal.
- I use the Claude app installed on my PC → follow Connect from the Claude desktop app.
- I use ChatGPT → follow Connect from ChatGPT. Web only, with plan requirements.
- I use developer tools like Claude Code, Codex, or Cursor → see Client setup in the developer docs.
Connect from your browser
You can connect without installing anything or opening a terminal.1
Open the Claude connectors screen
In your browser, open the Claude connectors screen.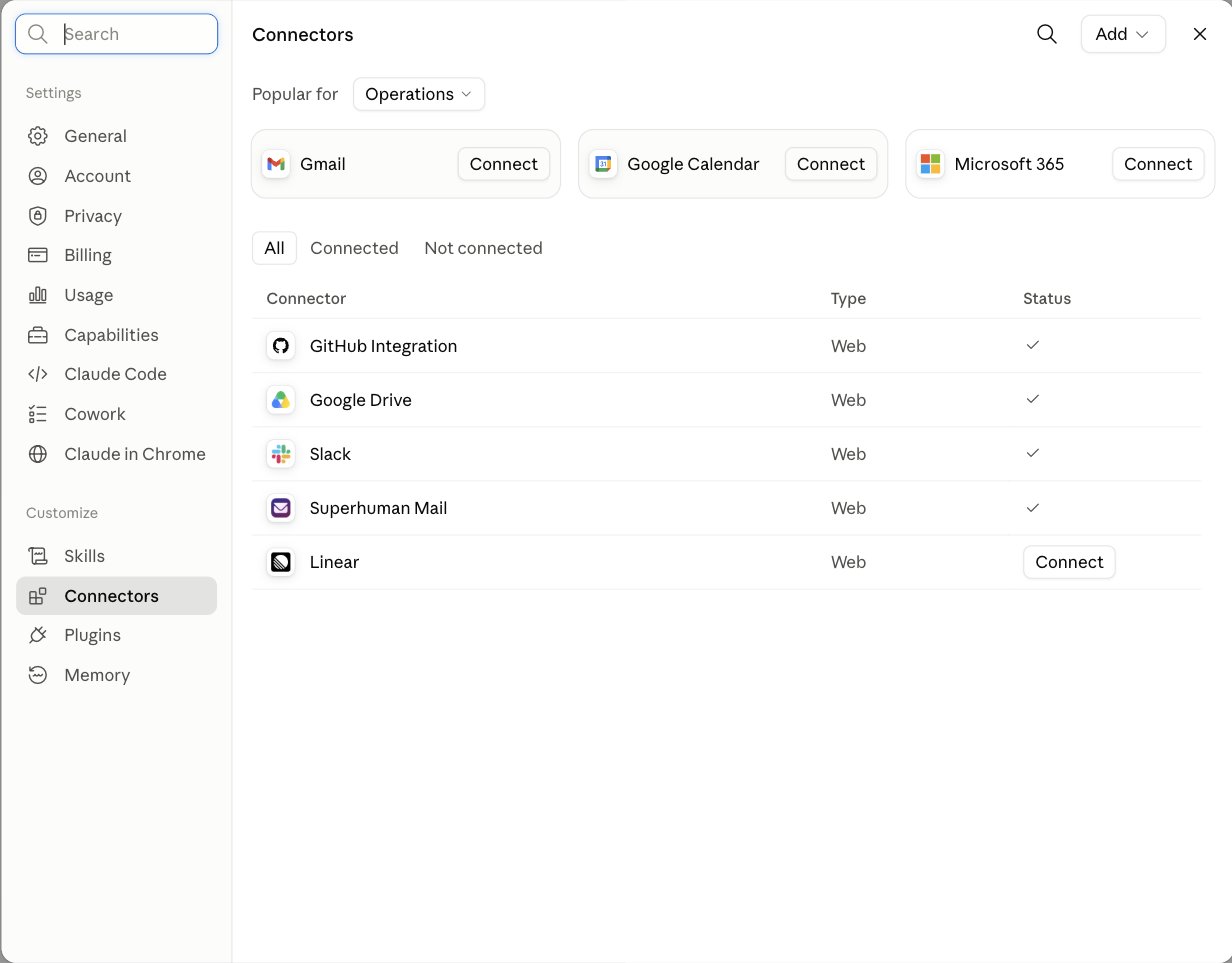
2
Add the Tiro connector
Click the [Add] button in the top right, then choose [Add custom connector].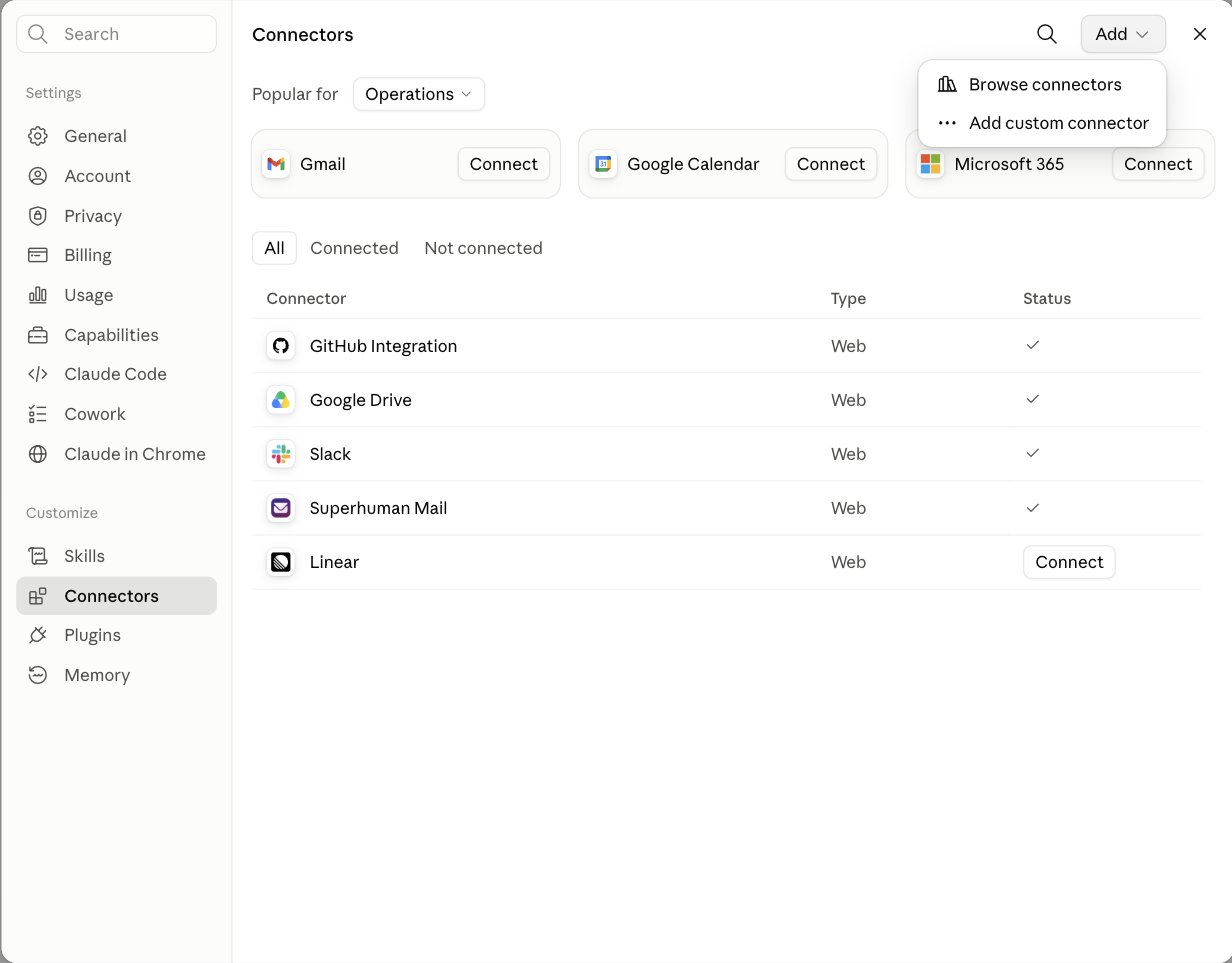
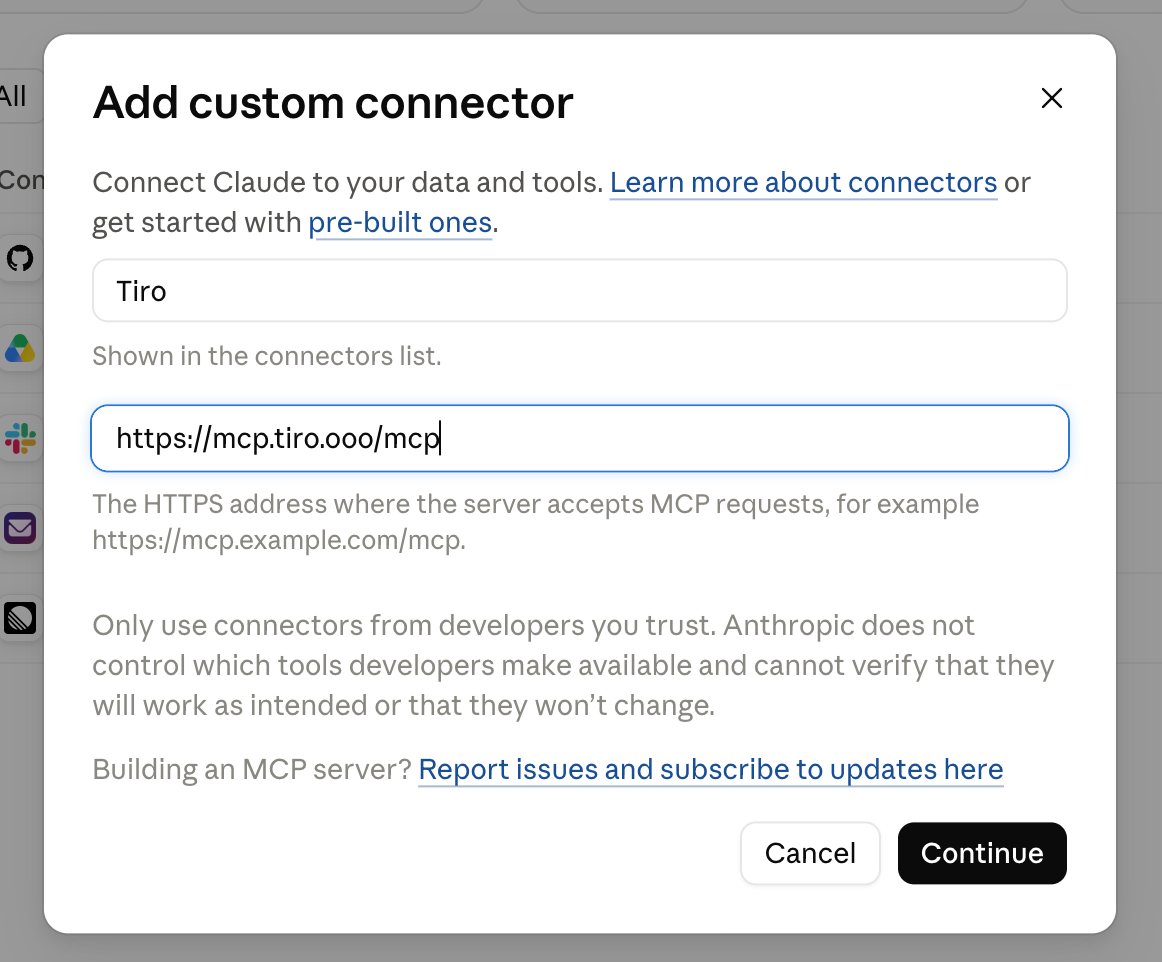
Tiro as the name, paste https://mcp.tiro.ooo/mcp into the Remote MCP server URL field, and click [Continue].3
Link your Tiro account
On the added Tiro connector, click [Connect]. In the new window, sign in with the Tiro account you normally use, review the note and folder read permissions, and allow the connection. You never type your Tiro password into Claude.
4
Turn Tiro on in a conversation
Start a new conversation in Claude and click the [+] button at the bottom left of the message box. Turn Tiro on under [Connectors]. Adding a connector to your account and turning it on in each conversation are separate steps.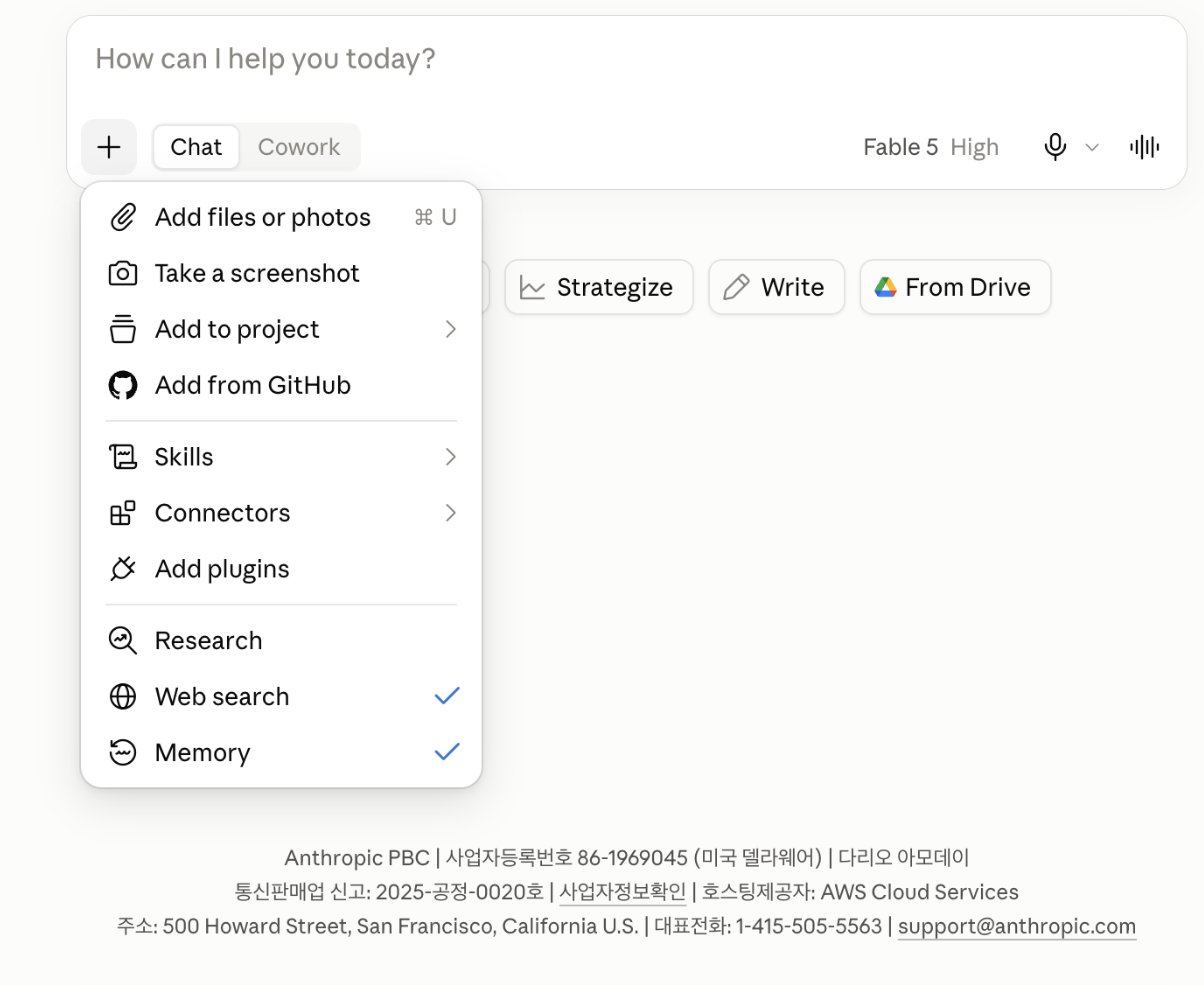
5
Confirm the connection
Ask Claude:
Find my recent notes in Tiro and list their titles. If Claude shows it is using Tiro tools and returns note results, you are connected.The Claude Free plan allows one custom connector. On a Team or Enterprise organization account, if you don’t see the [Add custom connector] button, an organization admin may need to add the connector first.
Connect from the Claude desktop app
The Claude app installed on your PC (Claude Desktop) connects through a settings file. You don’t have to hunt for folders: a button inside the app opens the file for you.1
Install Node.js
Download and install the LTS version from the official Node.js site. The Claude app uses it internally to talk to Tiro. Skip this step if it’s already installed.
2
Open the settings file
In the Claude app, go to Settings → Developer → Edit Config. The folder containing the settings file (
claude_desktop_config.json) opens automatically, so there is no need to type in a folder path yourself.3
Paste the Tiro connection settings
Open
claude_desktop_config.json in an editor such as Notepad, paste in the following, and save.claude_desktop_config.json
4
Restart the Claude app
Quit the Claude app completely and open it again. Just closing the window may not apply the change.
5
Link your Tiro account
On first connection a browser window opens. Sign in with the Tiro account you normally use, review the note read permission, and allow the connection.
6
Confirm the connection
Ask Claude:
Find my recent notes in Tiro and list their titles. If Claude shows it is using Tiro tools and returns note results, you are connected.Connect from ChatGPT
You can connect Tiro in ChatGPT too and search and read your notes there. Since July 2026 ChatGPT handles external connections through its apps system, so a service that isn’t in its directory (like Tiro) is added directly after turning on Developer mode. The name sounds developer-y, but the steps below need no development knowledge.Before you start (per OpenAI’s official policy):
- Web (chatgpt.com) only. Custom apps don’t work in the ChatGPT mobile app.
- Personal accounts need the Pro plan or higher. Free and Plus plans don’t support custom connections.
- On Business workspaces only admins can turn it on; on Enterprise/Edu, only members an admin has authorized. On a company account, ask your admin.
1
Turn on Developer mode
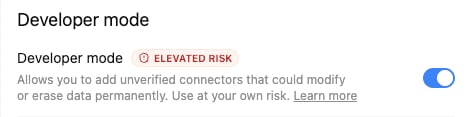
In your browser, open chatgpt.com and go to your profile → Settings → Plugins, then click the Developer mode entry at the bottom of the list.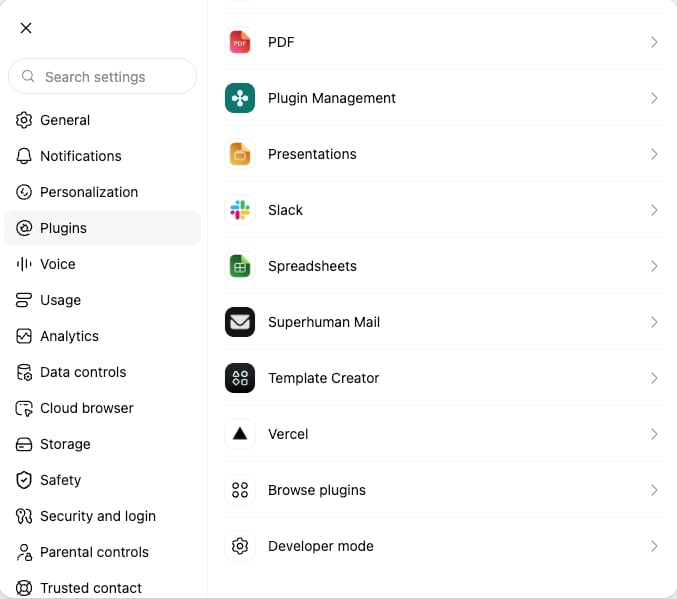
2
Add Tiro
Open Plugins in the left menu and click the [+] button in the top right to open the New Plugin dialog. Enter 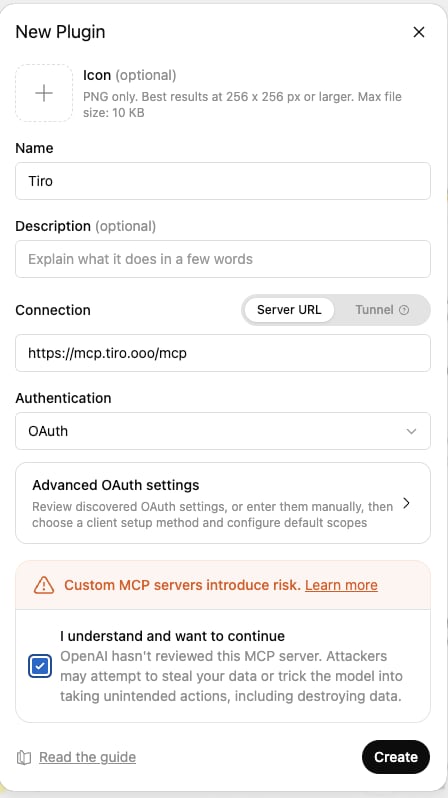
Tiro as the name and https://mcp.tiro.ooo/mcp in the Connection field. Leave Authentication on the default OAuth, check I understand and want to continue, and click [Create].3
Start linking your Tiro account
When the Add Tiro to ChatGPT window appears, click [Sign in with Tiro] and sign in with the Tiro account you normally use.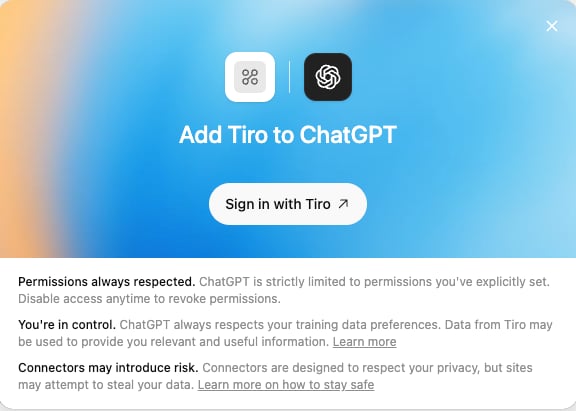
4
Allow permissions
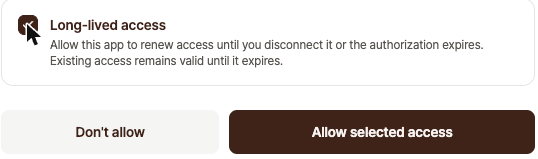
On the Tiro permissions screen, review the read permissions and make sure to check [Long-lived access] at the bottom. ChatGPT needs permission to keep renewing the connection, so the [Allow selected access] button only activates once this is checked.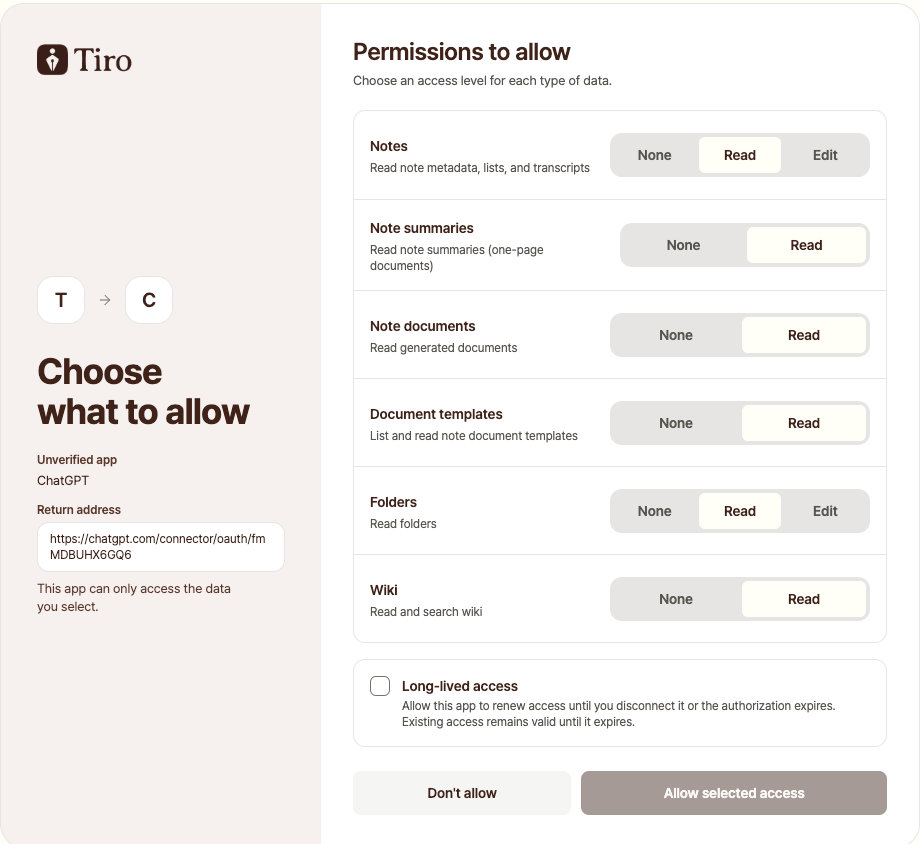
5
Confirm the connection
In a new chat, ask:
Find my recent notes in Tiro and list just their titles. Use the Tiro plugin. If note titles come back, you are connected.This ChatGPT feature is in beta, so menu names and screens may change. If what you see differs from these steps, check the official OpenAI guide or send a capture of your screen to support.
4. API and CLI: wire it into automated workflows
A REST API gives you note lookups and search, webhooks, and wiki data. From a terminal or CI environment, the Tiro CLI lets you work with notes. Available on every plan at no extra charge. → About the API, MCP, and CLI · Developer docsIs my data safe?
Whichever way you connect, you can only touch notes you already have access to, and the note permission model applies as-is. Customer data is never used to train AI models. For the details, see Privacy and security.Related pages: Ask Tiro · Wiki · About the API, MCP, and CLI